Many users reported they are seeing the Video Scheduler Internal Error on their Windows 10 or the Windows 11 OS when booting or doing something on their PC/laptop.
As per the users, the error appears with a blue screen of death and the Windows system freezes for a couple of minutes upon restarting.
Generally, the Video Scheduler Internal blue screen error when the graphics card you are running gets outdated or missing. This is really very irritating as you can’t do anything on your Windows system and needed to be fixed ASAP.
Luckily many users managed to fix the error, so here in this article, we have shortlisted the possible fixes that worked for many users to get past the error on their Windows system. So follow the step-by-step instructions given to fix the error.
But before jumping straight to the fixes it is important to learn the common culprits causing the error.
What Causes Video Scheduler Internal Error?
- Outdated Graphics Driver: If you haven’t updated your graphics drivers for a while, then outdated graphics drivers can also cause this error.
- Outdated Windows: Running an older build of the Windows operating system, then the outdated operating system can also cause this error.
- Corrupt Operating System: If some of the Windows operating system files are corrupted or missing, then this error can show up.
- Virus or Malware infection: In many cases, the virus or malware infection on your system start causing issues in the Windows system and leads to the blue screen error.
- Antivirus and Windows Defender confliction: The security systems installed on your computer can also conflict with the graphics card or operating system and ultimately start showing the BSOD error.
- Hardware Acceleration: If hardware acceleration is enabled in your computer, then it can also cause an error.
So, these are the common reasons responsible for the
How to Fix Video Scheduler Internal BSOD Error?
Solution 1 – Run Check Disk From Command Prompt
Check disk is a service available in Windows which can check any physical and logical error in the file system of your computer.
This has the potential to fix the error, so it is recommended to run the check disk. To run check disk from command prompt follow the steps mentioned below:
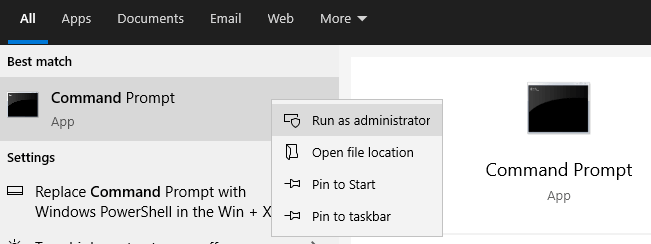
- Click on the Start Menu and search for cmd in the search bar.
- Now right-click on Command Prompt and click on the Run as Administrator option.
- In Command Prompt, type this command: chkdsk C: /f /r /x and press enter.
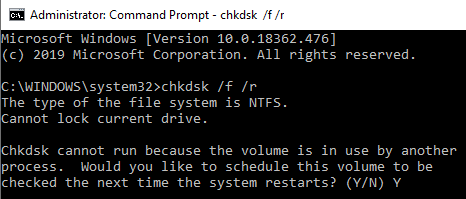
- Now the check disk system will search for errors in your computer and if there are no errors then it will show a message no error.
- And if there are errors, it will tell you to restart the computer to repair the file system.
If there are any errors available on your computer, restart it and repair the issues and check if the video scheduler’s internal error is resolved or not.
Solution 2 – Run System File Checker Command
The system file checker is an inbuilt windows service which scans for corrupt or missing Windows files and repairs them after scanning once To run the system file checker follow the steps mentioned below:
- Click on the start icon and search for cmd.
- In the command prompt type sfc/scannow and press enter to run the command.
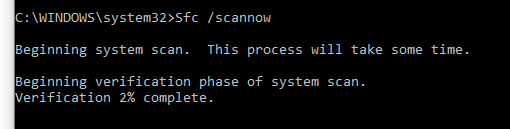
- Now, wait for the System File Checker to complete the scanning process to search and fix corrupted Windows files.
- Once the process is done, restart your PC and check if the Video Scheduler Internal Error is resolved or not.
Soluiton 3 – Update Graphics Driver
Graphics drivers help your computer to communicate with the graphics card, so it is a very important part of your computer and you always need to keep it updated. If you haven’t updated your graphics card drivers for a while, then it is recommended to update your graphics card drivers. To update your computer’s graphics card drivers follow the steps mentioned below:
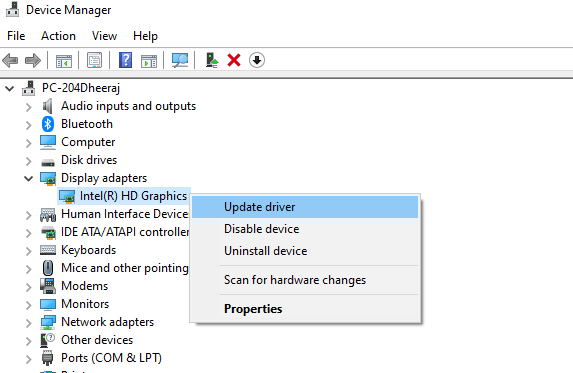
- Press Windows + I and click on the Device Manager.
- In Device Manager, click on the Display adapters option.
- Now right-click on the graphics card name you want to update and click on the update driver option.
- Now click on Search automatically for drivers on the web and if available Windows will download and install them.
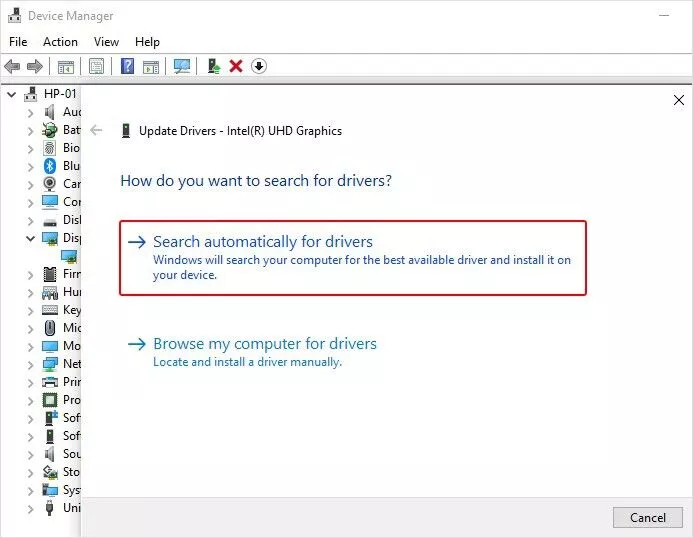
- After the process is done, restart your PC and check if the error is resolved or not.
Solution 4 – Reinstall Graphics Driver
If the methods mentioned above didn’t work for you, we recommend you reinstall the graphics drivers of your computer, to do so follow the steps mentioned below:
- Click on the Start icon and search for Device Manager.
- In Device Manager, click on the Display adapters option to expand it and then right-click on your graphics card name and click on the uninstall driver option.
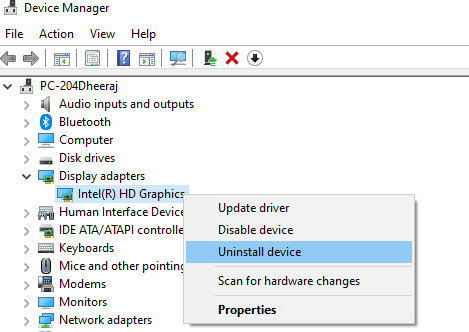
- Now restart your PC and your computer will install the driver automatically.
- Now check if the error is resolved or not.
Solution 5 – Update Windows OS
If you are using an older build or beta version of Windows then you are recommended to update your operating system as earlier builds or beta versions of the operating system can cause these types of errors. To update the operating system follow the steps mentioned below:
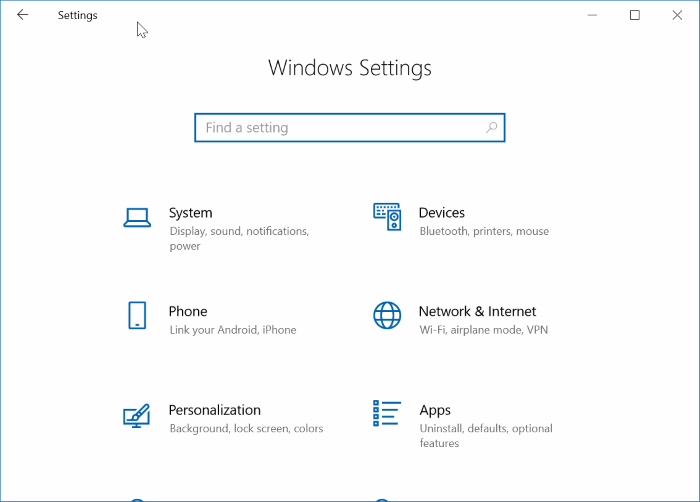
- Press Windows + I to open Settings.
- In settings click on the Windows update option available on the left side.
- Now click on the check for updates option and now Windows will search for updates to download and install them if available.
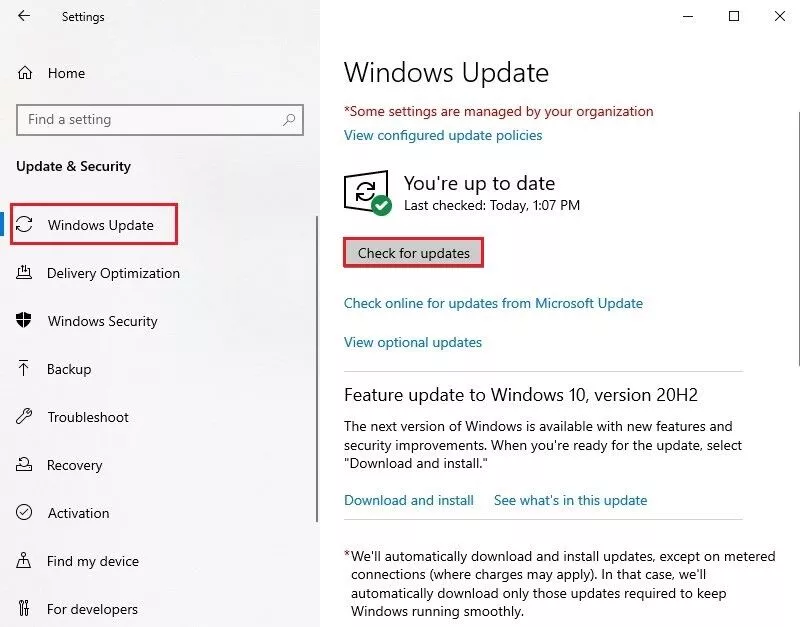
- After the update process is done, restart your device and check if the error is resolved or not.
Solution 6 – Scan for Viruses and Malware Infection
The availability of viruses and malware in your computer is most likely to cause BSOD Video Scheduler Internal Error. So it is recommended to scan your system with a good antivirus program to check if there is any type of virus present on your computer. To check for threats on your computer follow the steps mentioned below:
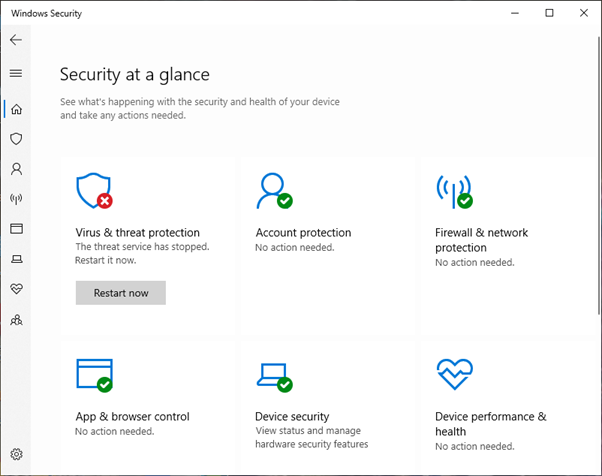
- Click on the Start icon and search for Windows Security.
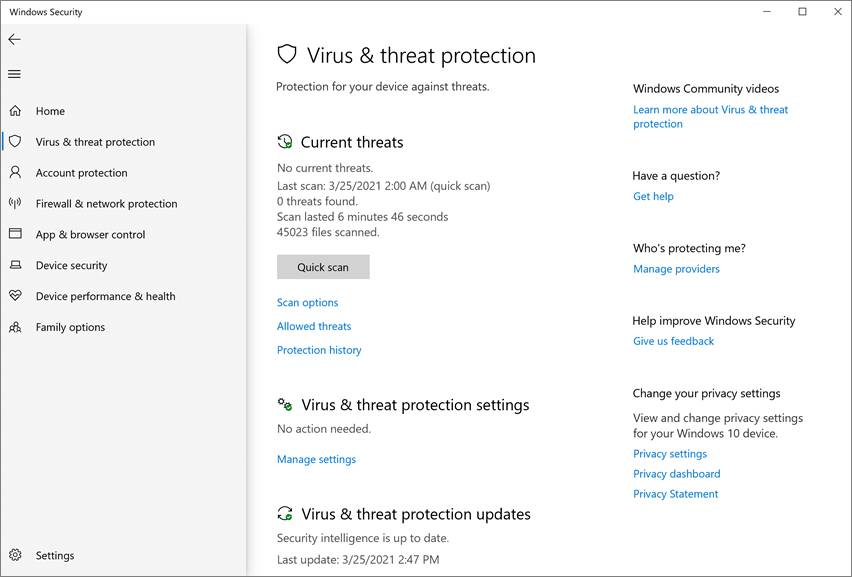
- And click on Windows Security and click on the Virus and Threat protection option available on the left side.
- Then click on the Scan options available below the quick scan option.
- Now check the Full Scan option and click on the Scan Now option.
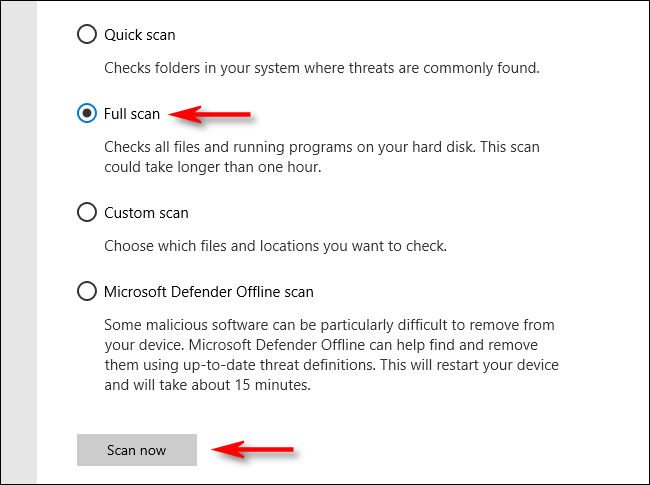
- Let Windows defender search for threats and delete them.
- Now restart your PC and check if the error is resolved or not.
Solution 7 – Revert Recent Changes
If you are facing the issue recently after installing a particular software, it is recommended to uninstall the software as it can also cause the Video Scheduler Internal blue screen error. To uninstall the error follow the steps mentioned below:
- Click on the Start icon and search for Settings in the search bar
- In Settings, click on the Apps option available on the left side.
- Now click on the application you installed recently and then click on the uninstall option.
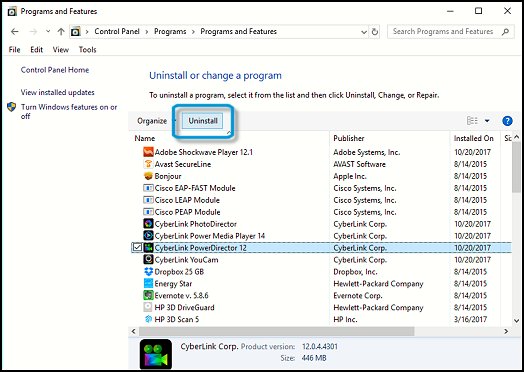
- Let the process complete and then restart your PC and check if the error is resolved or not.
Soluiton 8 – Disable the Security Systems of Your Computer
In many cases, the security systems of your computer conflict with the graphics card drivers, and other system processes which results in showing the error. So it is recommended to disable the security systems of your computer and check if the error is resolved or not. To disable the security systems of your computer follow the steps mentioned below:
Windows Defender
- Click on the Start Menu and search for Windows Security in the search bar.
- Now click on the Virus and Threat Protection option.
- Now click on the Manage Settings option.
- Then click turn off the Real-Time Protection.

Third-Party Antivirus
- Launch the antivirus and click on the Settings option.
- Now click on the Disable option and disable the antivirus for the recommended time period.

- Restart your device and check if the video scheduler internal error is resolved or not.
Solution 9 – Perform Factory Reset
If none of the methods mentioned solution works for you to get past the Video Scheduler Internal Error on Windows 11, then we will suggest you perform a factory data reset on your computer, to do so follow the steps mentioned below:
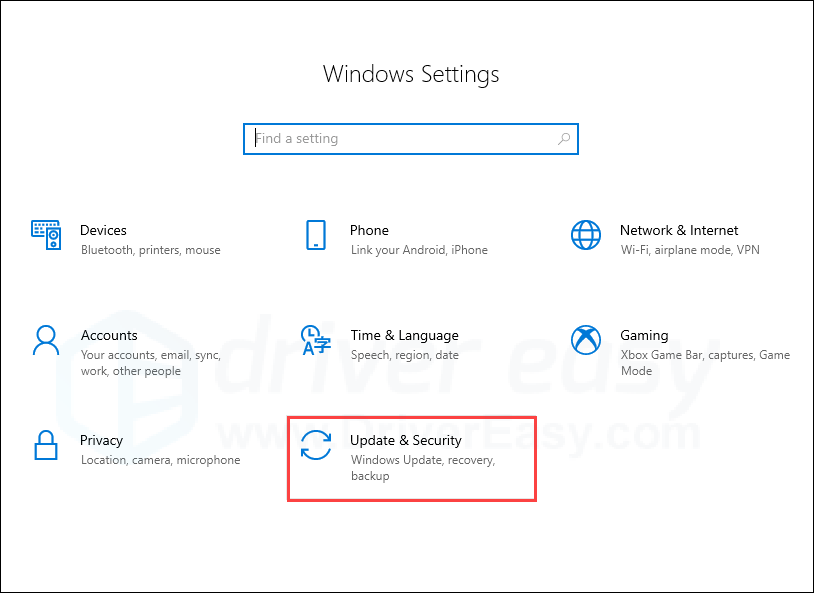
- Click on the Start icon and then search for Settings in the search bar.
- And click on the Update & Security option available on the left side.
- Now click on the Recovery option available on the left side.
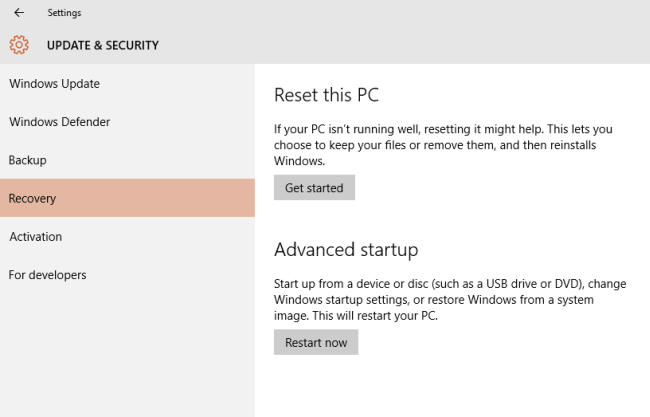
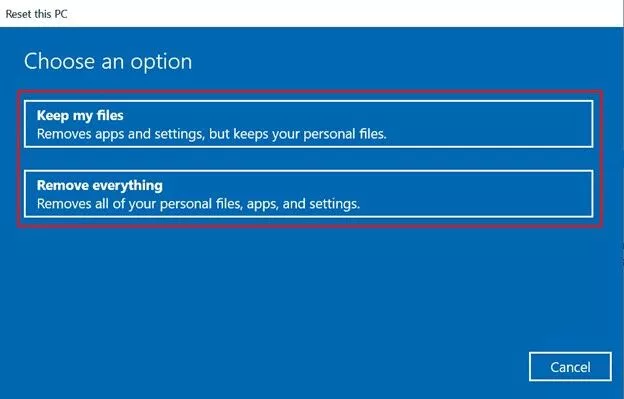
- Then click on the Get Started button in the Reset this PC section.
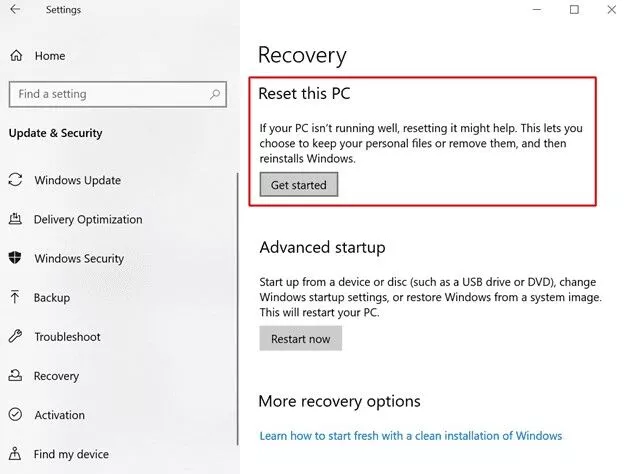
- Now choose if you want to keep your files or remove everything.
- Click on Local Reinstall and complete the process.
- Next, let the process complete and once it’s done, check if the error is resolved or not.
Now check if the Video Scheduler Internal Error Windows 11 is fixed or not.
Conclusion:
So, this is all about the Video Scheduler Internal Error.
Make sure to try the fixes given one by one till you find the one that works for you. Hope the fixes given in the article helped you to solve this blue screen error easily.
Thank You..!